Last week, I drew up HYPERLINK http://bakingbites.com/2007/08/baking-cookies-in-a-car/ some guidelines to follow if you wanted to try baking cookies in your car. This past weekend, since the temperatures were well over 100F out here, I decided to give the technique a try myself. I parked my car in full sunlight in the middle of the day, sliced up some cookie dough and started to bake. |
I previously noted
that most of the reporters and writers who tried this technique used
refrigerated, slice-and-bake cookie dough. My guess would be that they
chose to use that type of pre-fab dough because they might not be regular
bakers and were looking for something that would be quick and easy, since
the baking process using a car is not exactly fast. I went with a homemade
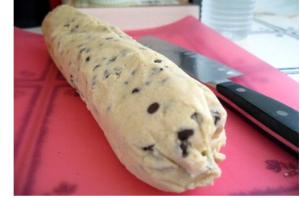
dough, but decided that I, too, would use a slice-and-bake type of cookie
(the recipe is at the bottom of this article). This meant that my
dough could be prepared well in advance and that I could control the
thickness of each cookie with precise slicing. Drop cookies work, too, but
this seems to be the best way to control spread and ensure even cooking. |
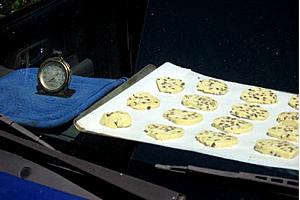
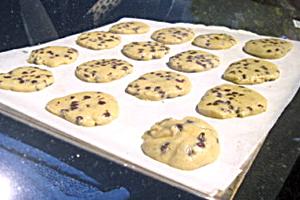
I sliced my dough
into 1/4-inch thick slices and placed them on a parchment lined baking
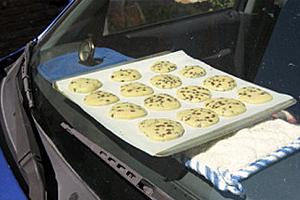
sheet. I used potholders to support the baking sheet (and to prevent any
damage to my dashboard from the hot metal) and placed both the cookies
and an oven thermometer in my car. 30 minutes later, the cookies were
beginning to spread slightly. |
The temperature
inside my car reached over 180F during baking. Since my car is
significantly larger than my oven, I didn�t want to open the car doors
at any point during the baking. I recommend that you remove anything you
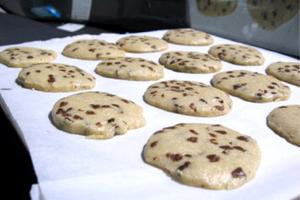
think you�ll need before you begin. Here are the cookies after about 1
hour: |
It took about 2 1/2
hours for the cookies to bake completely. I ended up opening the car
door shortly before the end of the baking period to check for doneness.
This check has to be done manually, as there are no color indicators
(such as brownness) to judge by because the sugar in the car cookies
does not caramelize and brown like that of oven-baked cookies. So, I
gently pressed the edges of the cookies to feel that they were firm and
even more gently touched the center of one of the cookies to see that it
held together and was not gooey (the center of the cookie should not be
entirely firm, unless you are shooting for a crispy cookie). Finally, I
slid one of the cookies around on the parchment paper - a good test for
this type of baking because a baked cookie |
will release easily from the paper, while an unbaked cookie will stick in place. If your cookies are not done, add more baking time in 15 or 30 minute increments, as opposed to the 30 second or 1 minute increments you might add to an oven-baked cookie. |
The finished
cookies were very light in color, but smelled and tasted delicious. They
were slightly crisp at the edges and chewy in the center. I think that
they were best hot out of the car, and believe that my tasters did, too,
since the whole batch was gone in under 5 minutes. My only regret is
that I didn�t bake more at one time, since it�s a time-consuming
process and not something I�m up for every day. |
Car-Baked Chocolate Chip Cookies |
In a small bowl,
whisk together flour, baking powder, baking soda and salt. Dominus
tecum Leonie
|